USA Civil War Website

USA Civil War Website
Discover The Civil War

Site Notifications
Home » Maps on this Site


Union Flag Carrier U. S. CIVIL WAR
PHOTOGRAPHS
Confederate Flag Carrier

ORIGINAL MAPS
ON THIS SITE


ABOUT THE MAPS

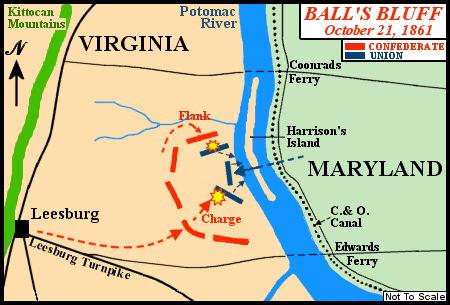
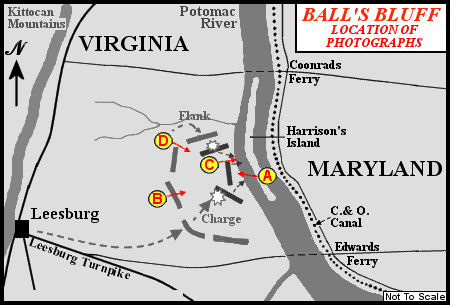
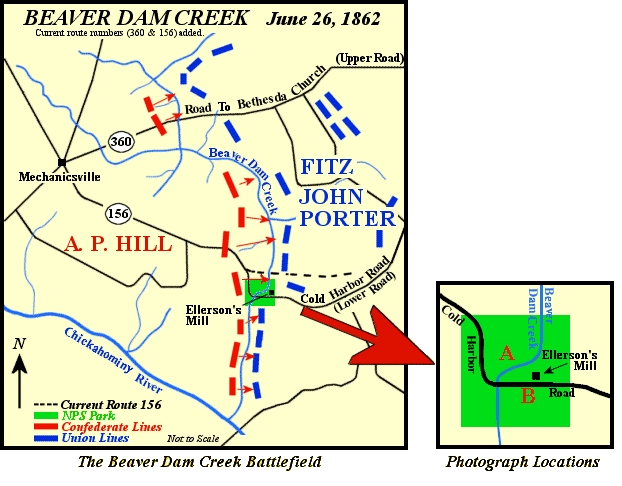
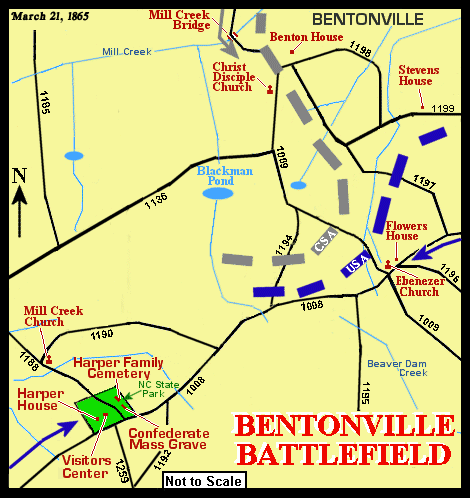
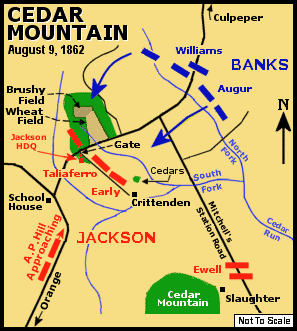
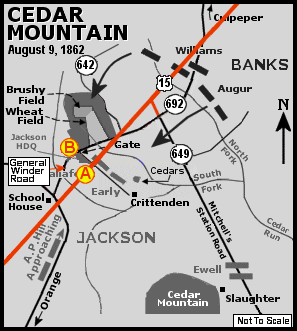
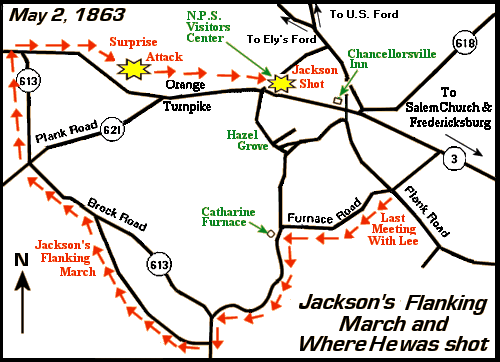
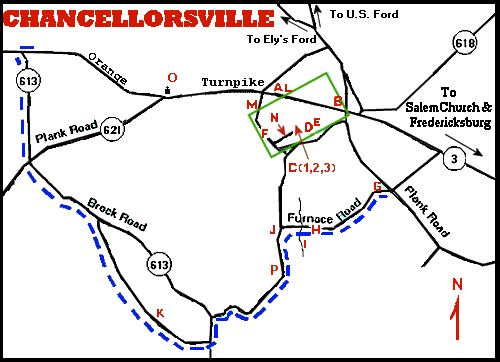
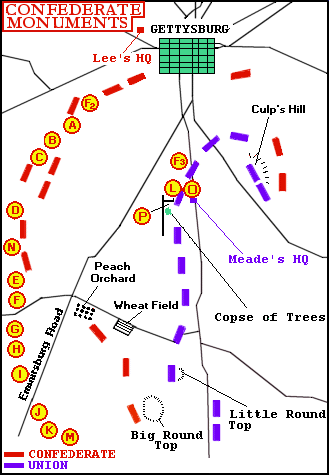
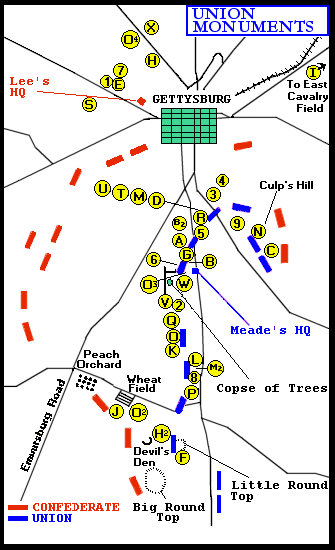
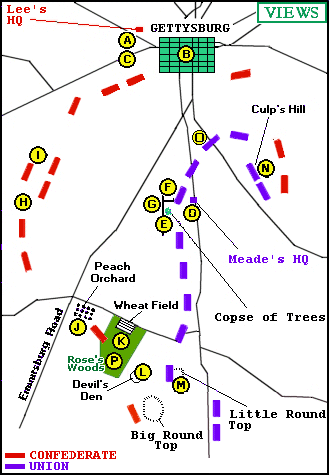
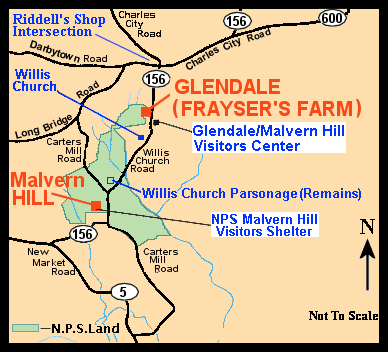
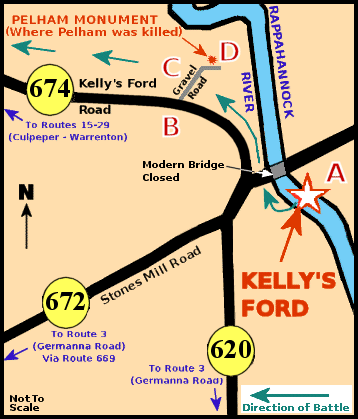
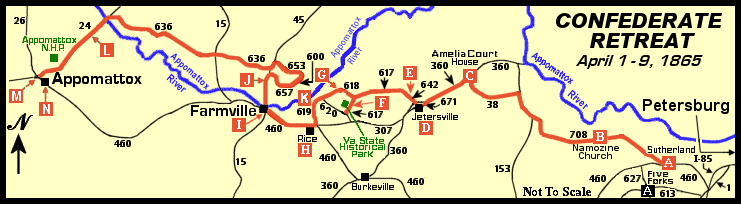
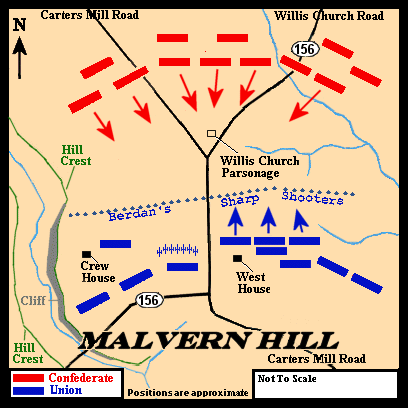
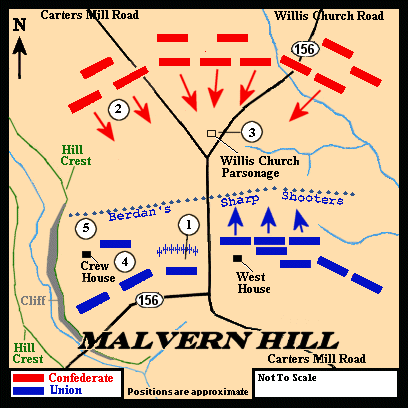
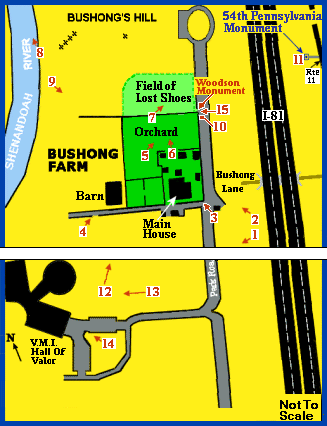
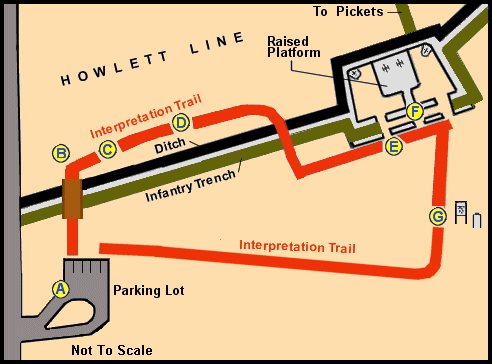
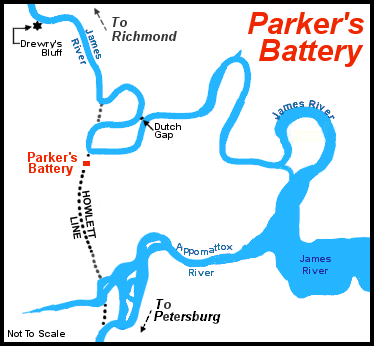
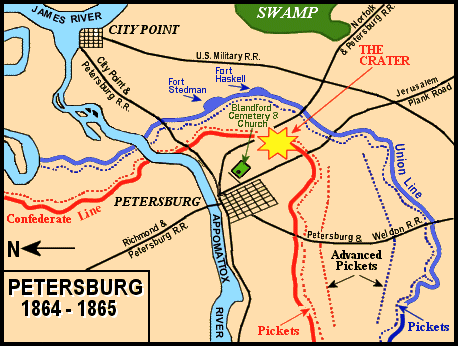
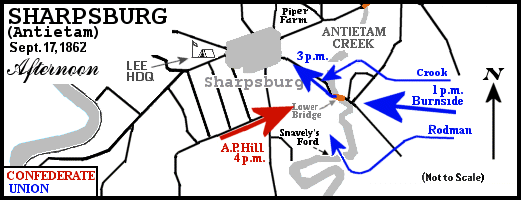
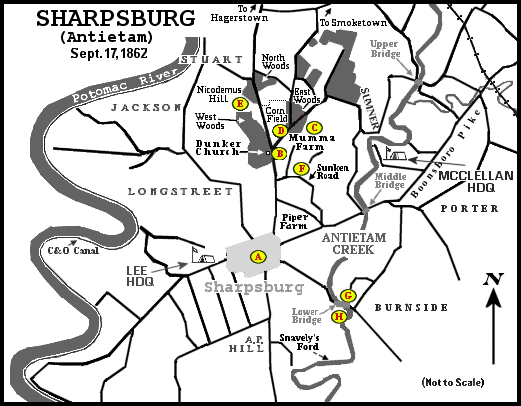
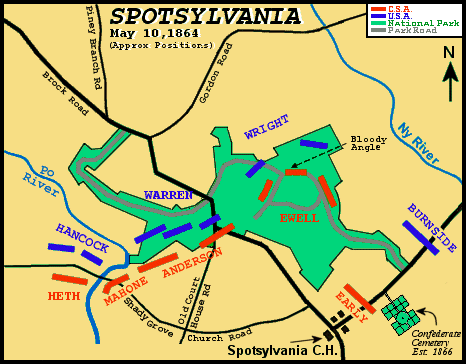
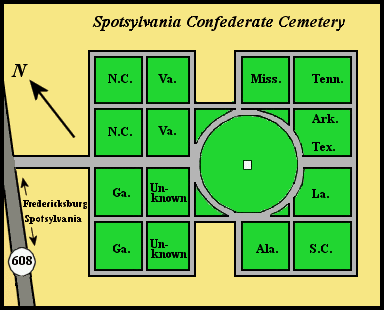
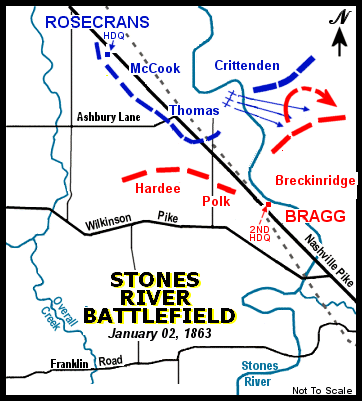
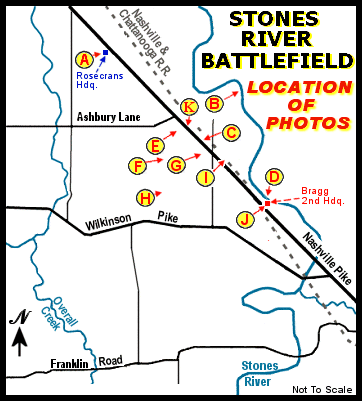
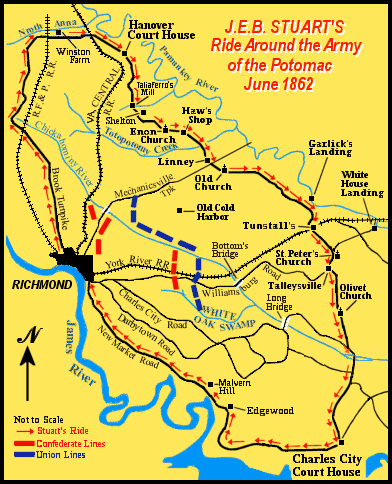
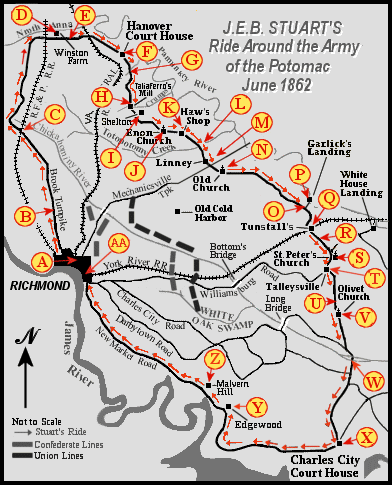
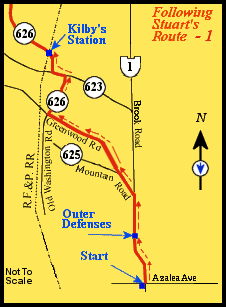
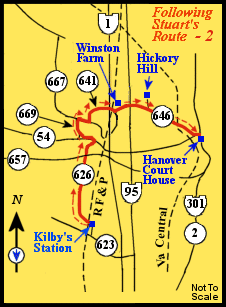
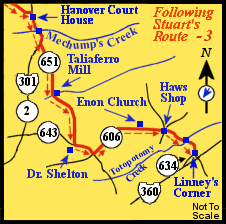
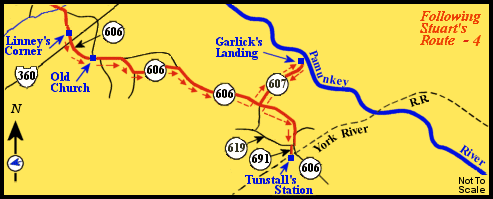
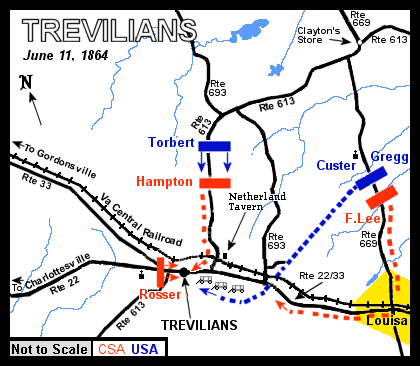
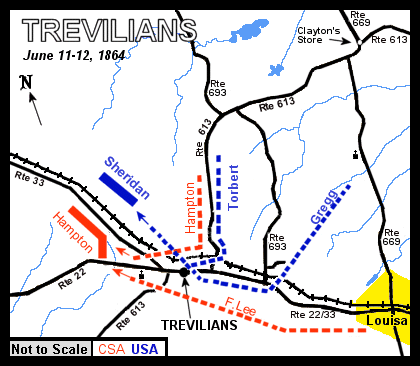
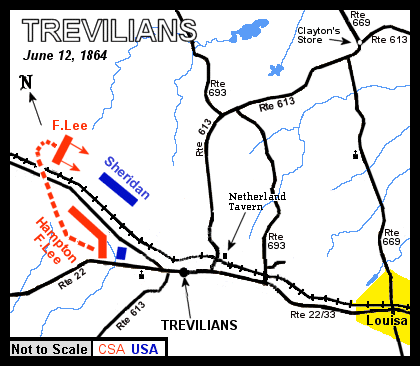
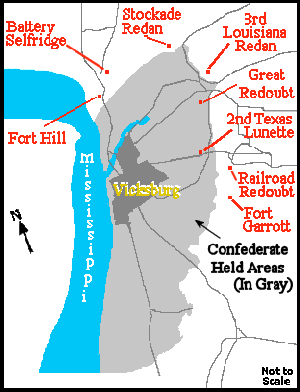
Most of the maps on the USA Civil War Web Site were produced by our Content Team and are not copies of any existing maps. We prepared the maps using a variety of sources and drew them in such a way as to best illustrate the information that 
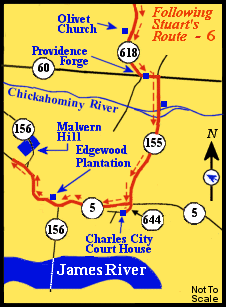
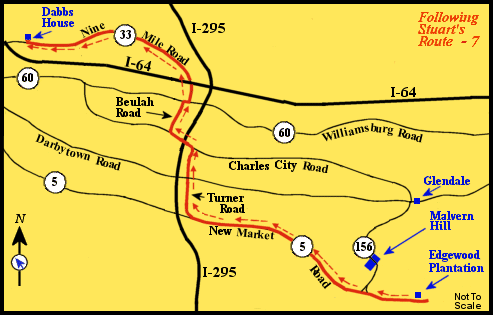
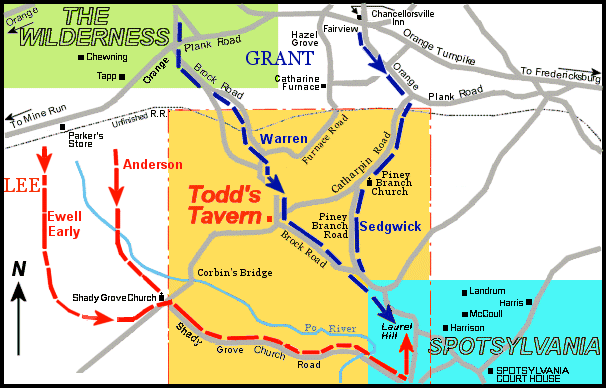
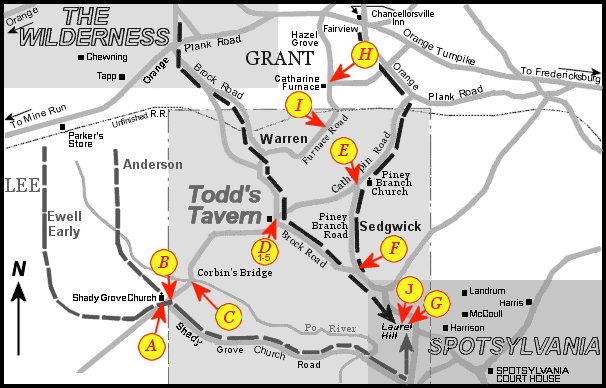
we wished to convey. The maps are not drawn to scale, rather, they are close approximations of the battlefield layout and the locations of people or units. Because of this, we don't recommend that they be used for planning any travel.

This page contains links to each of our 107* original maps. These maps are copyright and may not be used or reproduced without permission.

In the chart, below, the title of each map, ie. "Bentonville Battlefield", is a link to an image of the map. A second link, "Where used", associated with each of the maps, links to the HTML page on which the map appears or is referenced, providing additional information about it.

Finally, there are images on this site called "image maps". These images are only included here if the image is an actual map and not a "clickable" photograph.

Content Team

*There is a difference between the number of maps reported here and the count listed in the "Site Contents" portion of the main index page. This is because the count on the main index page includes maps that are not original to this site.


Maps on this site
Appomattox Area Where Used
Appomattox Building Locations Where Used
Balls Bluff Area Where Used
Balls Bluff Battlefield Where Used
Balls Bluff - Photograph Locations Where Used
Beaver Dam - Battlefield & Photograph Locations Where Used
Bentonville Battlefield Where Used
Cedar Mountain Battlefield Where Used
Cedar Mountain - Photograph Locations Where Used
Chancellorsville - Jackson's March and Attack Where Used
Chancellorsville - Jackson's March with Hazel Grove Outlined Where Used
Chancellorsville - Jackson's Wounding Where Used
Chancellorsville - Hazel Grove Where Used
Chancellorsville - Photograph Locations Where Used
Chimborazo Hospital Where Used
Cold Harbor Where Used
Evelynton Where Used
Fort Wead Where Used
Fort_Donelson Battlefield Where Used
Franklin Battlefield Where Used
Fredericksburg Where Used
Fredericksburg - Sunken Road Where Used
Gaines' Mill Where Used
Gaines' Mill Overlay on Cold Harbor Map Where Used
Gaines' Mill - Photograph Locations Where Used
Gettysburg - Location of Confederate Monuments Photographs Where Used
Gettysburg - Location of Union Monuments Photographs Where Used
Gettysburg - Location of View Photographs Where Used
Glendale (Frayser's Farm) Where Used
Kelly's Ford Where Used
Lee's Retreat Where Used
Malvern Hill
Where Used
Malvern Hill - Photograph Locations Where Used
Manassas 1 Battlefield Where Used
Manassas 2 Battlefield Where Used
Manassas 2 - Jackson's march around Pope Where Used
Manassas 2 - Warrenton - Chantilly Area Where Used
Manassas - Photograph Locations Where Used
Mine Run Campaign Overview Where Used
Mine Run Battlefield Where Used
Missionary Ridge (Chattanooga) 1860's Where Used
Missionary Ridge Monuments Where Used
Monocacy - Early's Route From Richmond Where Used
Monocacy - Battlefield Map Where Used
Monocacy - Battle Where Used
Monocacy - Photograph Locations Where Used
New Market - Theater of Operations Where Used
New Market - Morning status Where Used
New Market - Afternoon status Where Used
New Market - Photograph Locations Where Used
Parker's Battery Where Used
Parker's Battery - Howlett Line Where Used
Petersburg Where Used
Petersburg Mine (Crater) Where Used
Richmond - City Where Used
Richmond - Hollywood Cemetery Where Used
Richmond - Monument Avenue Where Used
Richmond - Outlying Area Where Used
Richmond - Seven Days Where Used
Sharpsburg - Special Order 191 Where Used
Sharpsburg - September 17, 1862 Initial Positions Where Used
Sharpsburg - Action on September 17, 1862 Where Used
Sharpsburg - Morning Action Where Used
Sharpsburg - Midday Action Where Used
Sharpsburg - Afternoon Action Where Used
Sharpsburg - Photograph Locations Where Used
Spotsylvania - Battlefield Where Used
Spotsylvania - Bloody Angle - Photo Locations Where Used
Spotsylvania - Confederate Cemetery Where Used
Staunton River - Battlefield Where Used
Staunton River - Photograph Locations Where Used
Stones River - Battlefield Where Used
Stones River - 12-31-1862 Battlefield Where Used
Stones River - 1-2-1863 Battlefield Where Used
Stones River - Photograph Locations Where Used
Stuart's Ride - Overall Map Where Used
Stuart's Ride - Photograph Locations Where Used
Section 1 of Stuart's Ride Where Used
Section 2 of Stuart's Ride Where Used
Section 3 of Stuart's Ride Where Used
Section 4 of Stuart's Ride Where Used
Section 5 of Stuart's Ride Where Used
Section 6 of Stuart's Ride Where Used
Section 7 of Stuart's Ride Where Used
Todds Tavern - Theater of Operations Where Used
Todds Tavern - Location of Photographs - Theater of Operations Where Used
Todds Tavern - Location of Photographs at Todds Tavern Where Used
Todds Tavern - Sheridan's Plan Where Used
Todds Tavern - Fitz Lee's Retreat Where Used
Todds Tavern - Gregg's Actions Where Used
Todds Tavern - Merritt's Actions Where Used
Todds Tavern - Final Actions Where Used
Tredegar Iron Works Where Used
Tredegar - Photograph Locations Where Used
Tredegar - Travel to Visitors Center Where Used
Trevilian - June 11, 1864 Where Used
Trevilian - Troop Movements Where Used
Trevilian - June 12, 1864 Where Used
Vicksburg - Locations Where Used
Vicksburg - Monuments Where Used
Western Area Map
Where Used
Wilderness - Location in Virginia Where Used
Wilderness - Theater of Operations (Part of Location map, above) Where Used
Wilderness - Troop Movements Where Used
Wilderness - Battlefield Where Used
Wilderness - Final Positions Where Used
Yellow Tavern Where Used


Home > Maps on this Site


Copyright © USA Civil War.com, 1998 - 2024.